In this lesson you will learn:
-
How to share your dashboards with specific stakeholders, such as content teams, marketing, or executives
-
How to enable access to dashboards for everyone in your project
For Self-Managed users
The examples in this lesson focus on Neo4j Aura’s sharing features. If you’re using Self-Managed Enterprise Edition, work with your administrator to manage dashboard access using your organization’s user management system.
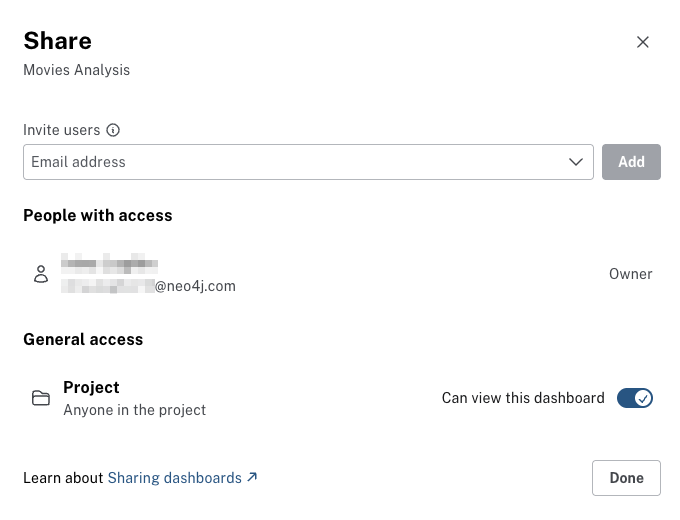
Sharing your dashboards
To share a dashboard:
-
Open the dashboard you want to share.
-
Click the Share button at the top right.
-
In the Share dashboard dialog:
-
Invite specific users by entering their email addresses.
-
Set project level access to allow everyone in the project to access the dashboard.
-
Click Send Invites to send the invitations.
-
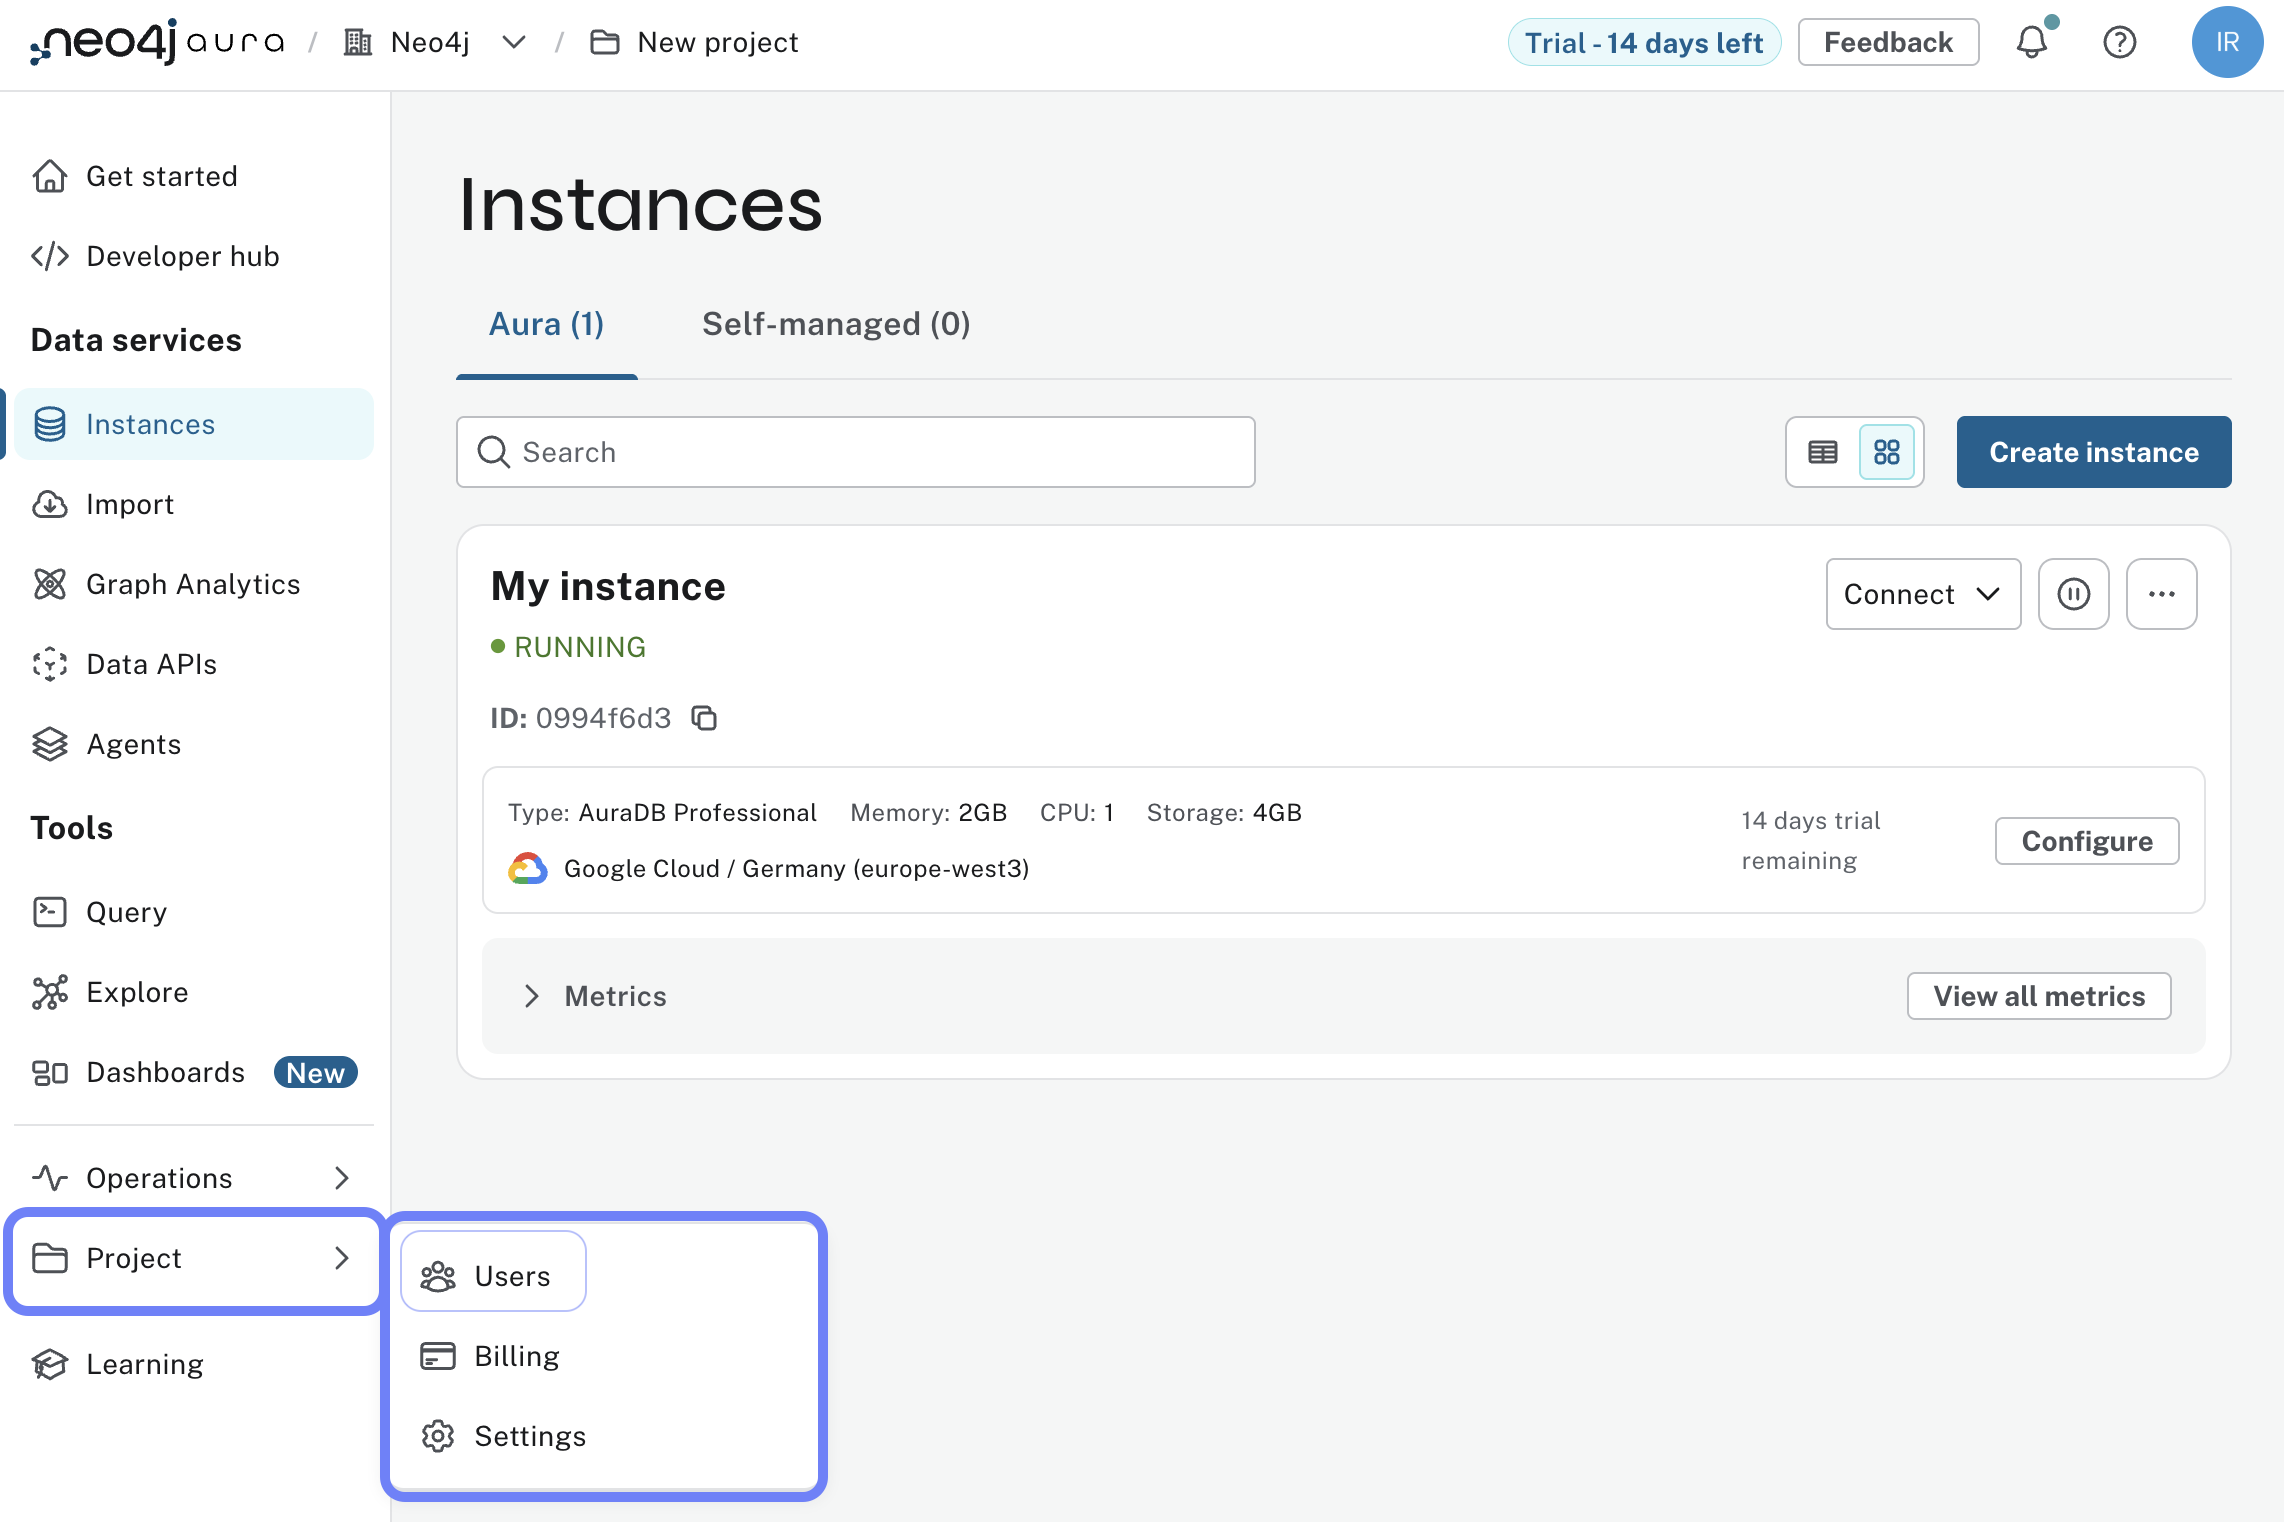
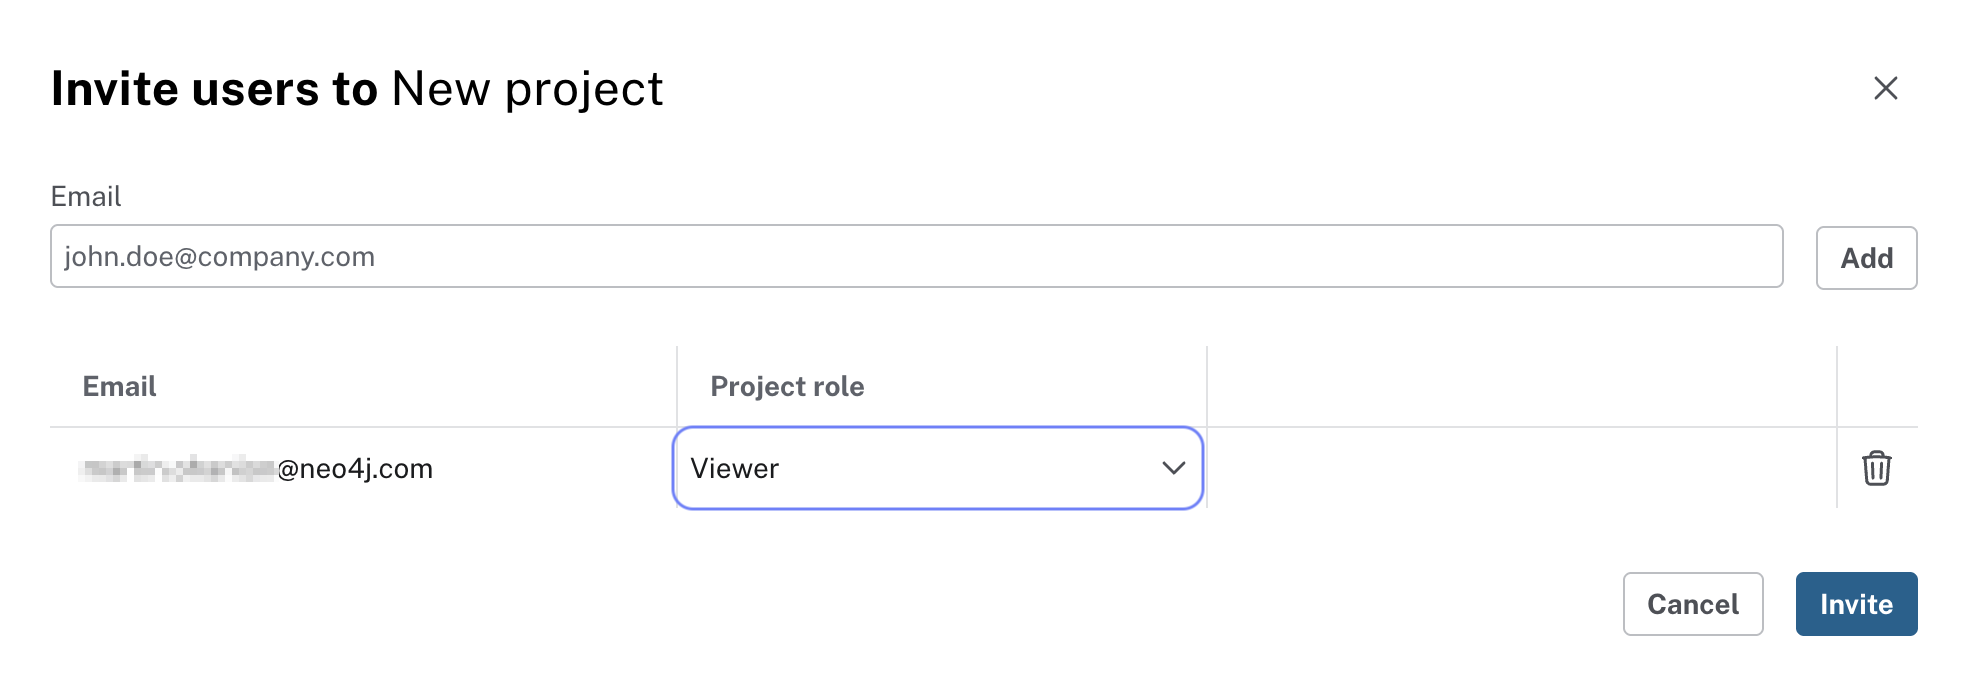
To invite users to your project so they can access your dashboards, follow these steps:
-
Go to the Project Settings page in the console
-
Click on the Users menu
-
Click on the Invite Users button
-
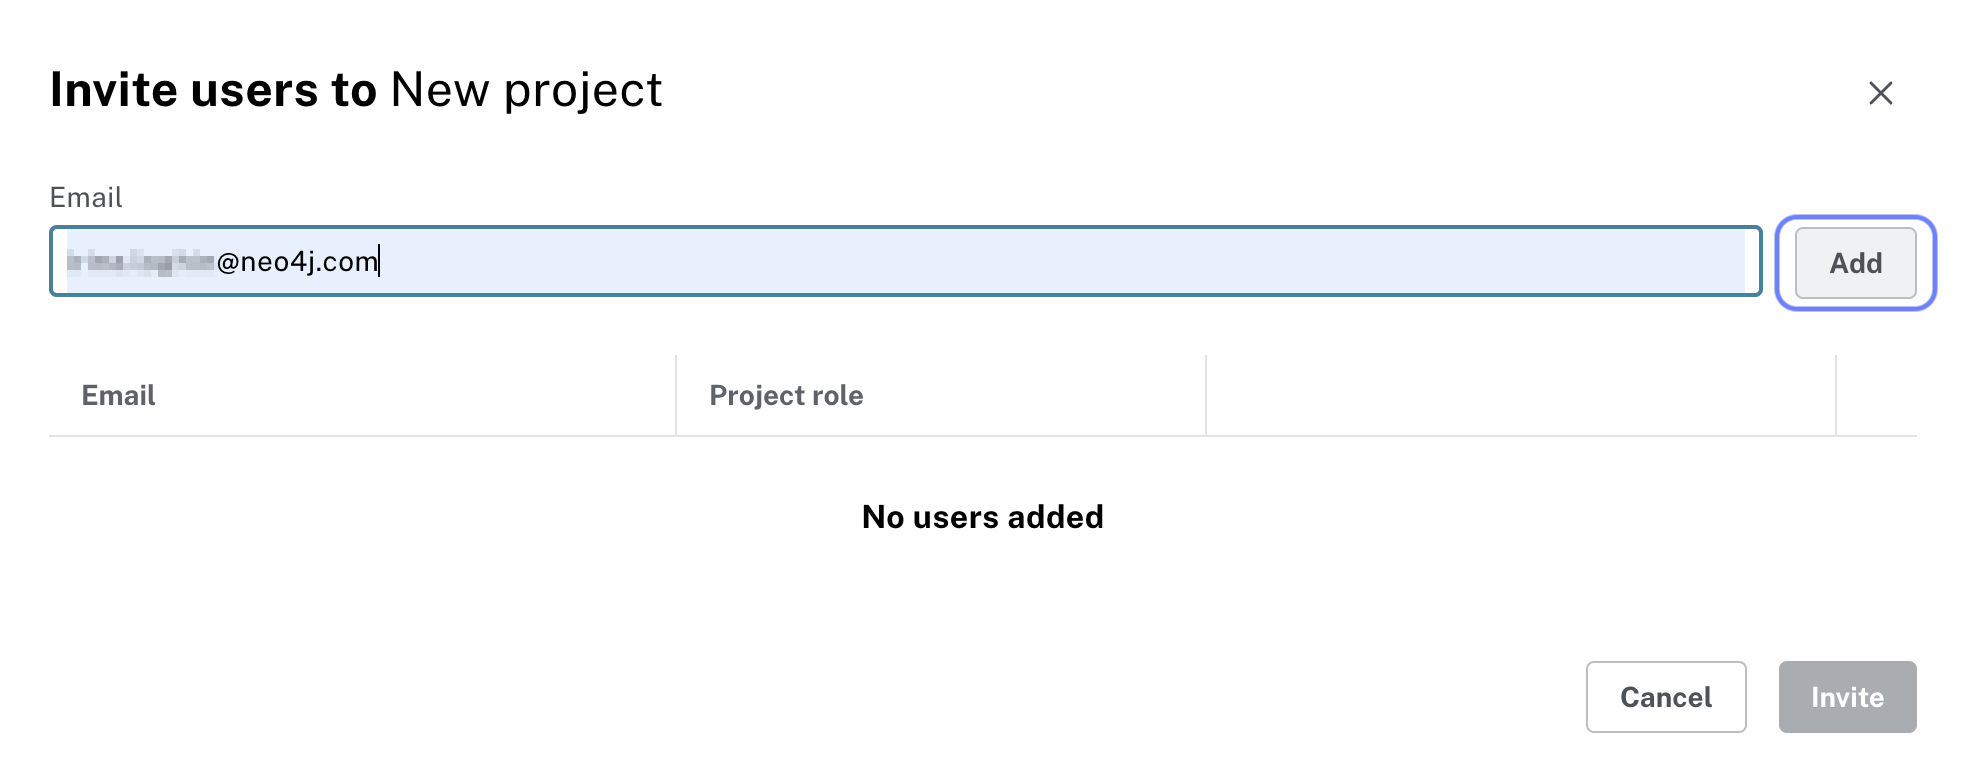
Enter the email addresses of the users you want to invite
-
Select the appropriate roles for the invited users
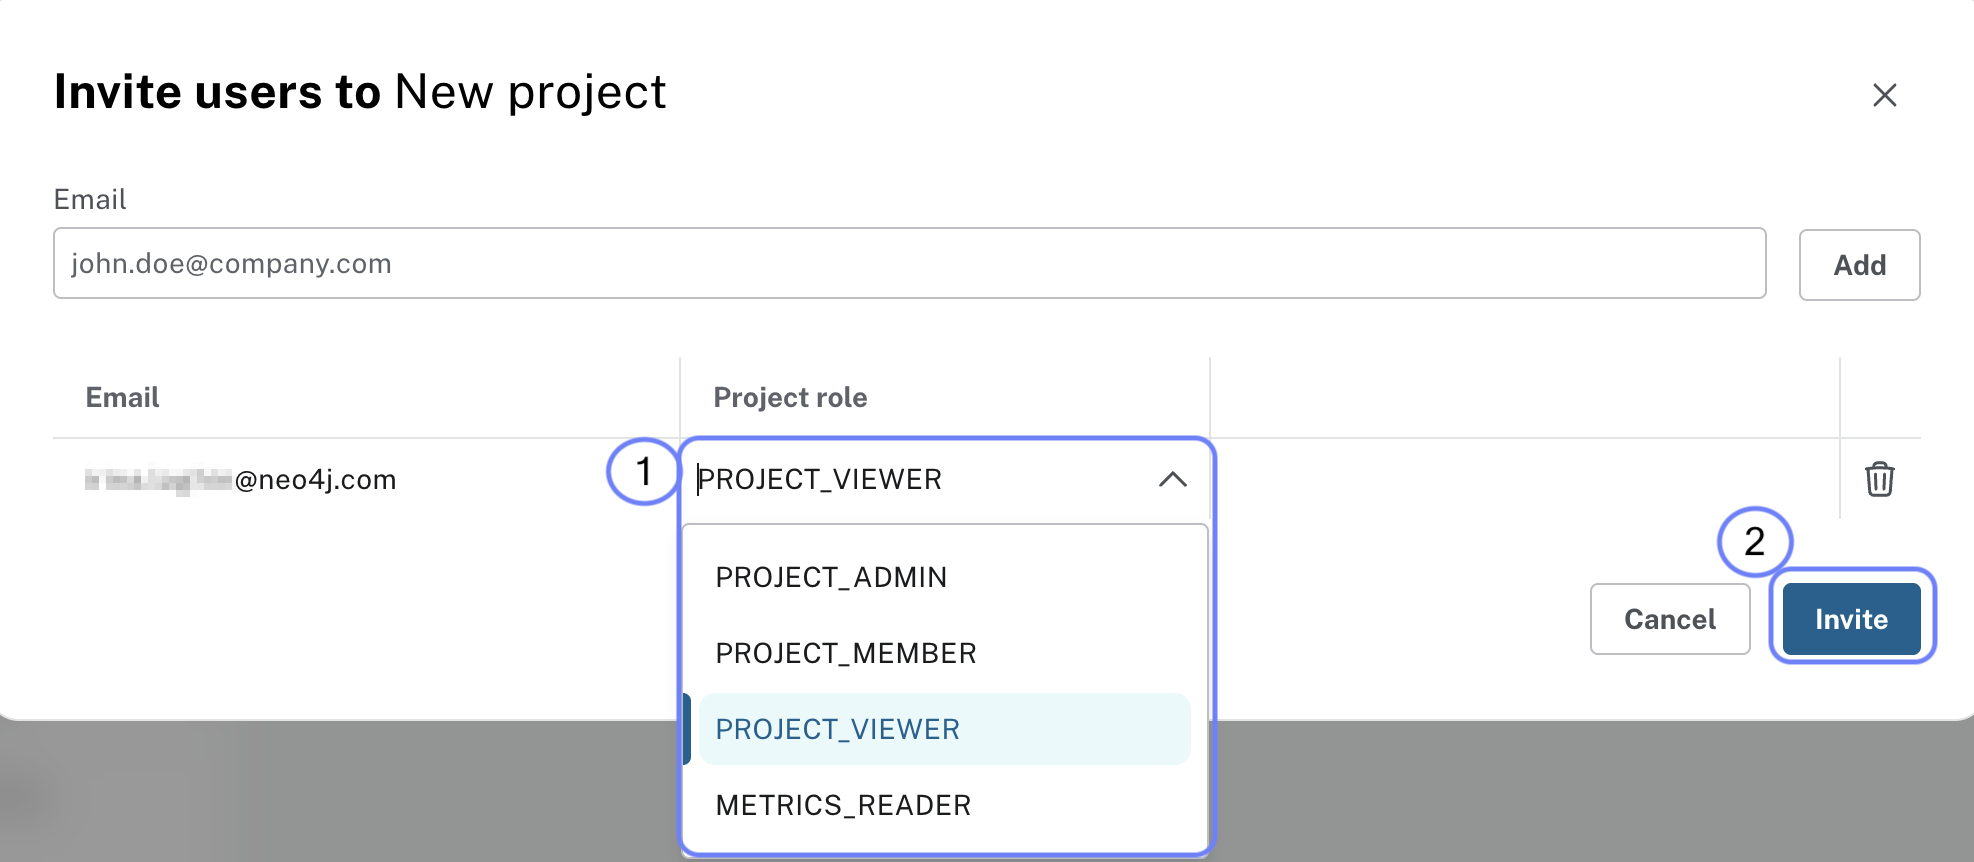
-
Click Send Invites to send the invitations
-
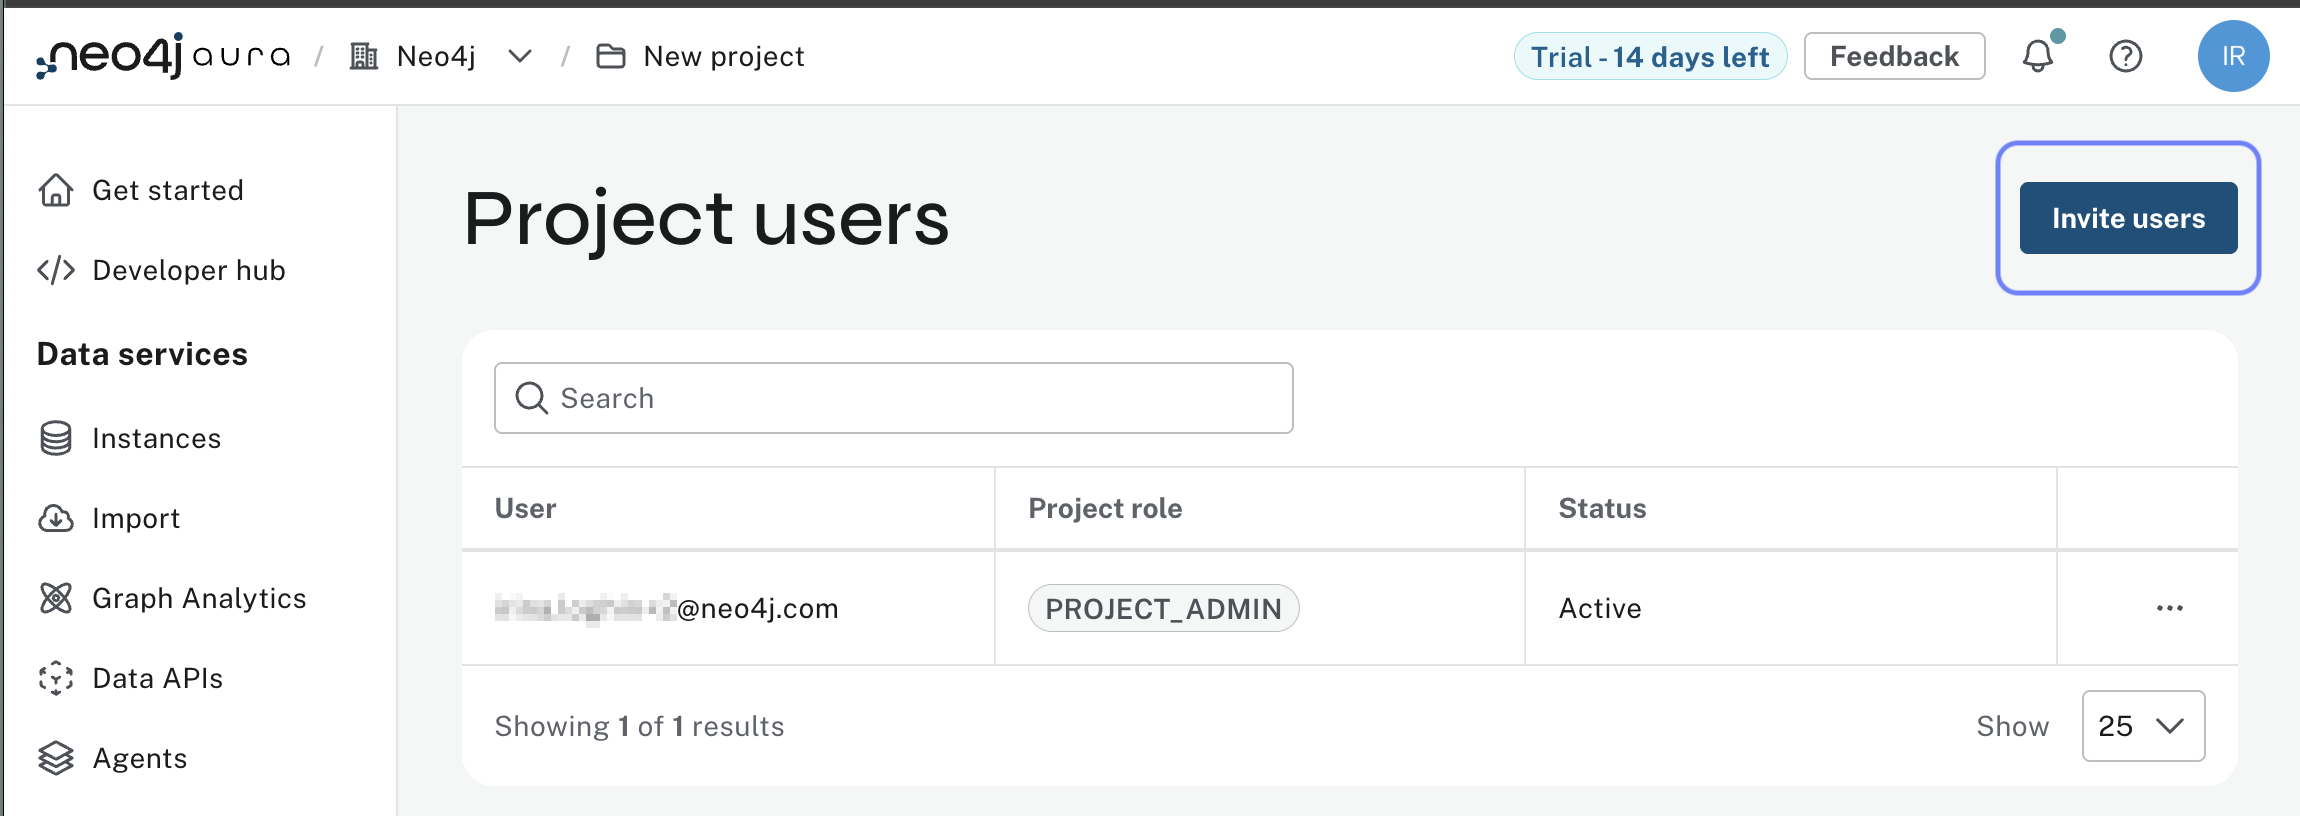
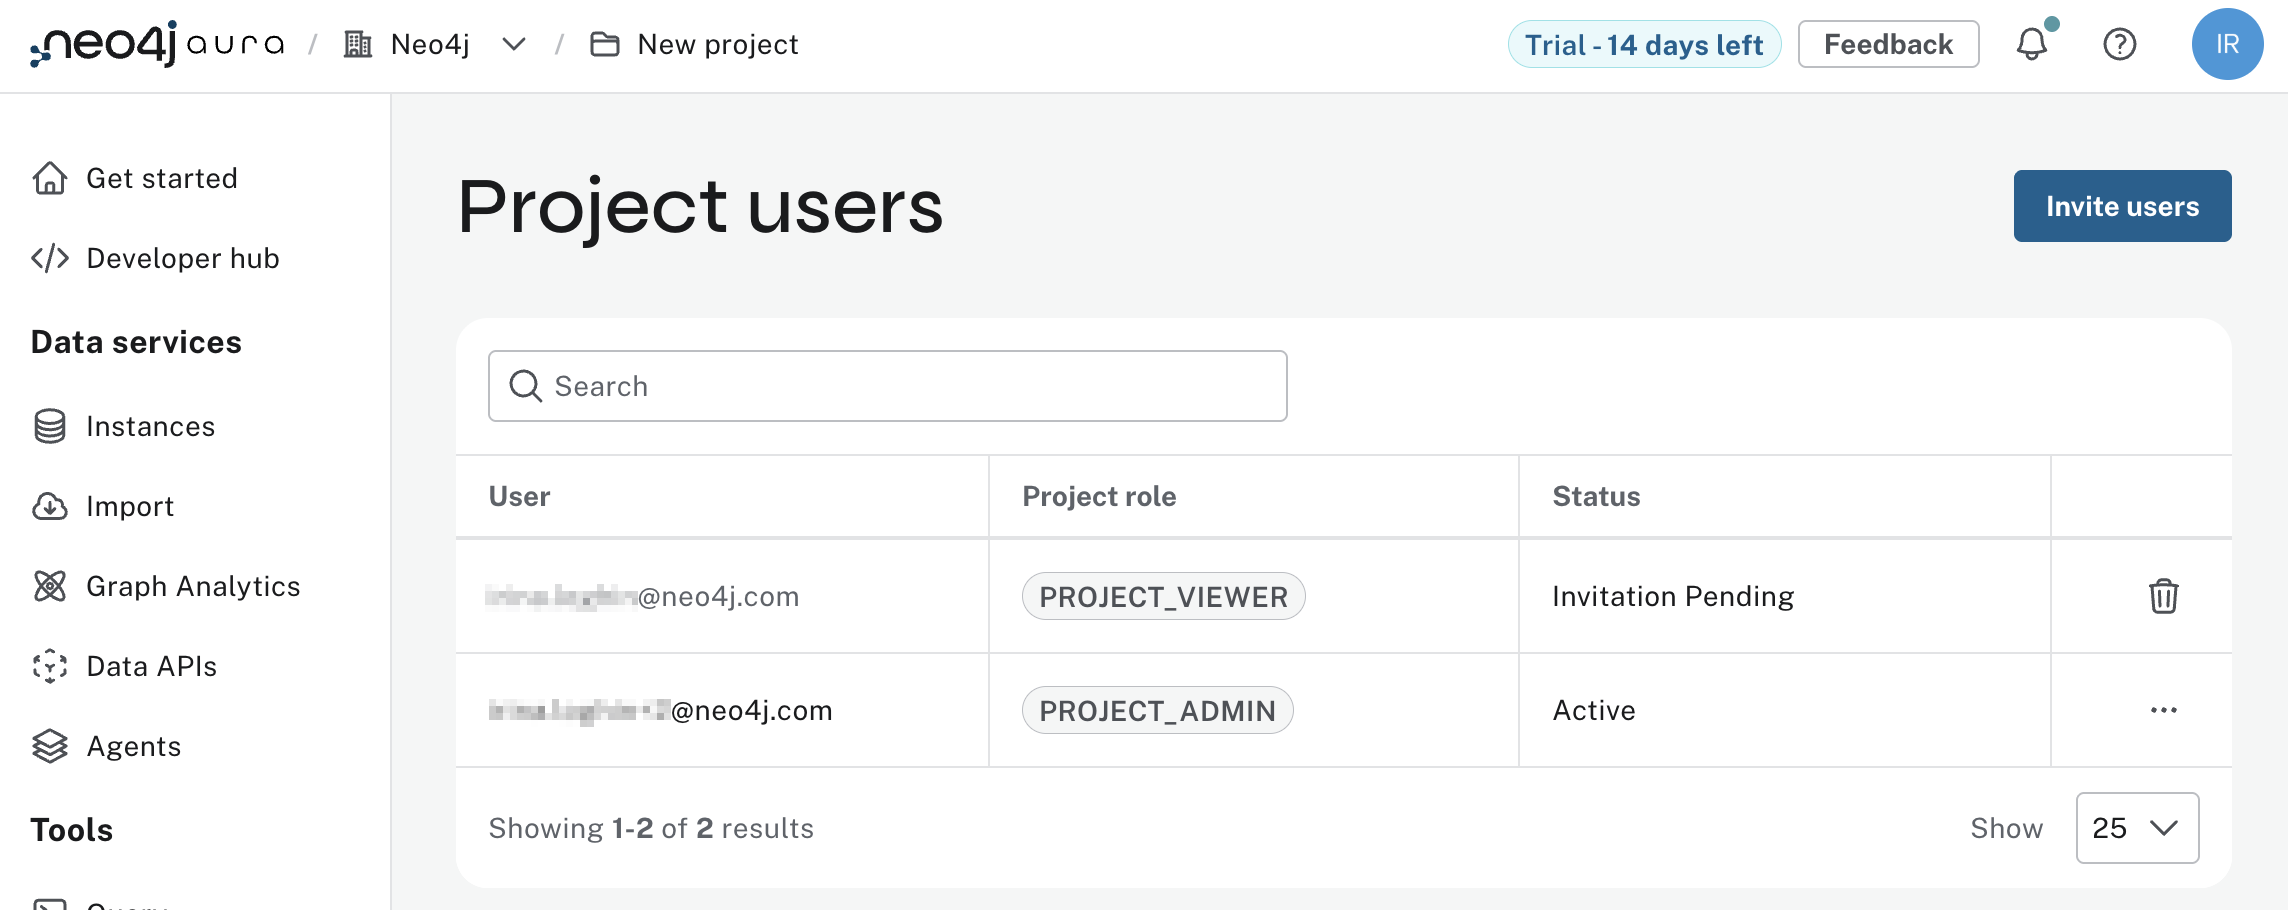
Review the full list of your project users by going to the Users menu in the Project Settings page, where their roles and statuses are displayed
Understanding user roles
Before you share dashboards, read each role and what it can do:
| Role | Access and capabilities |
|---|---|
Organization Admin |
Has full access to all projects and instances within the organization. Can manage users, billing, and organization settings. |
Project Admin |
Has full access to all instances within a specific project. Can manage users and project settings. |
Project Member |
Has read and write access to instances within a specific project but cannot manage users or settings. |
Project Viewer |
Has read-only access to instances within a specific project. Cannot make any changes to the instance or settings. |
Metrics Reader |
The only role that cannot view Dashboards. Metrics Reader has access to view performance metrics and monitoring data for instances within a specific project. Cannot make any changes to the instance or settings. |
Console vs instance access
Access to the Aura Console lets users manage projects and instances. Dashboard sharing is controlled by project roles (Viewer, Member, Admin). In Aura, connection to an instance uses the credentials you set when creating the instance.
Sharing dashboards through email invitation
Confirm invited users accepted and hold the Viewer role on the project.
Then share the dashboard with them by email:
After you click Invite, invited users get email with a link to the dashboard and can open every page you created in it.
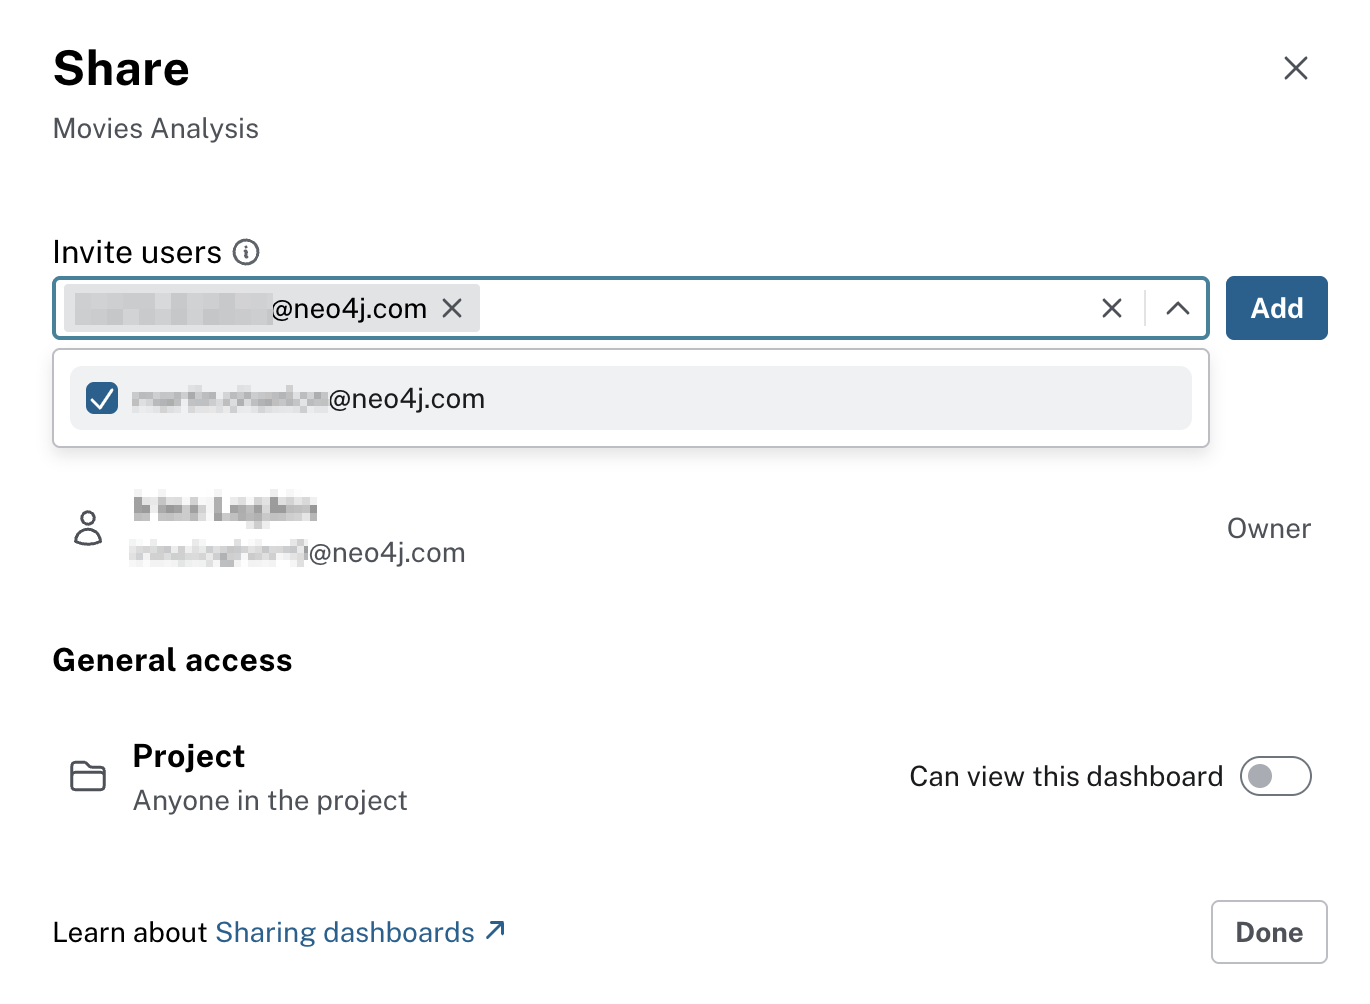
Setting general project access
To allow everyone in your project to have access to the dashboards, set the project level access:
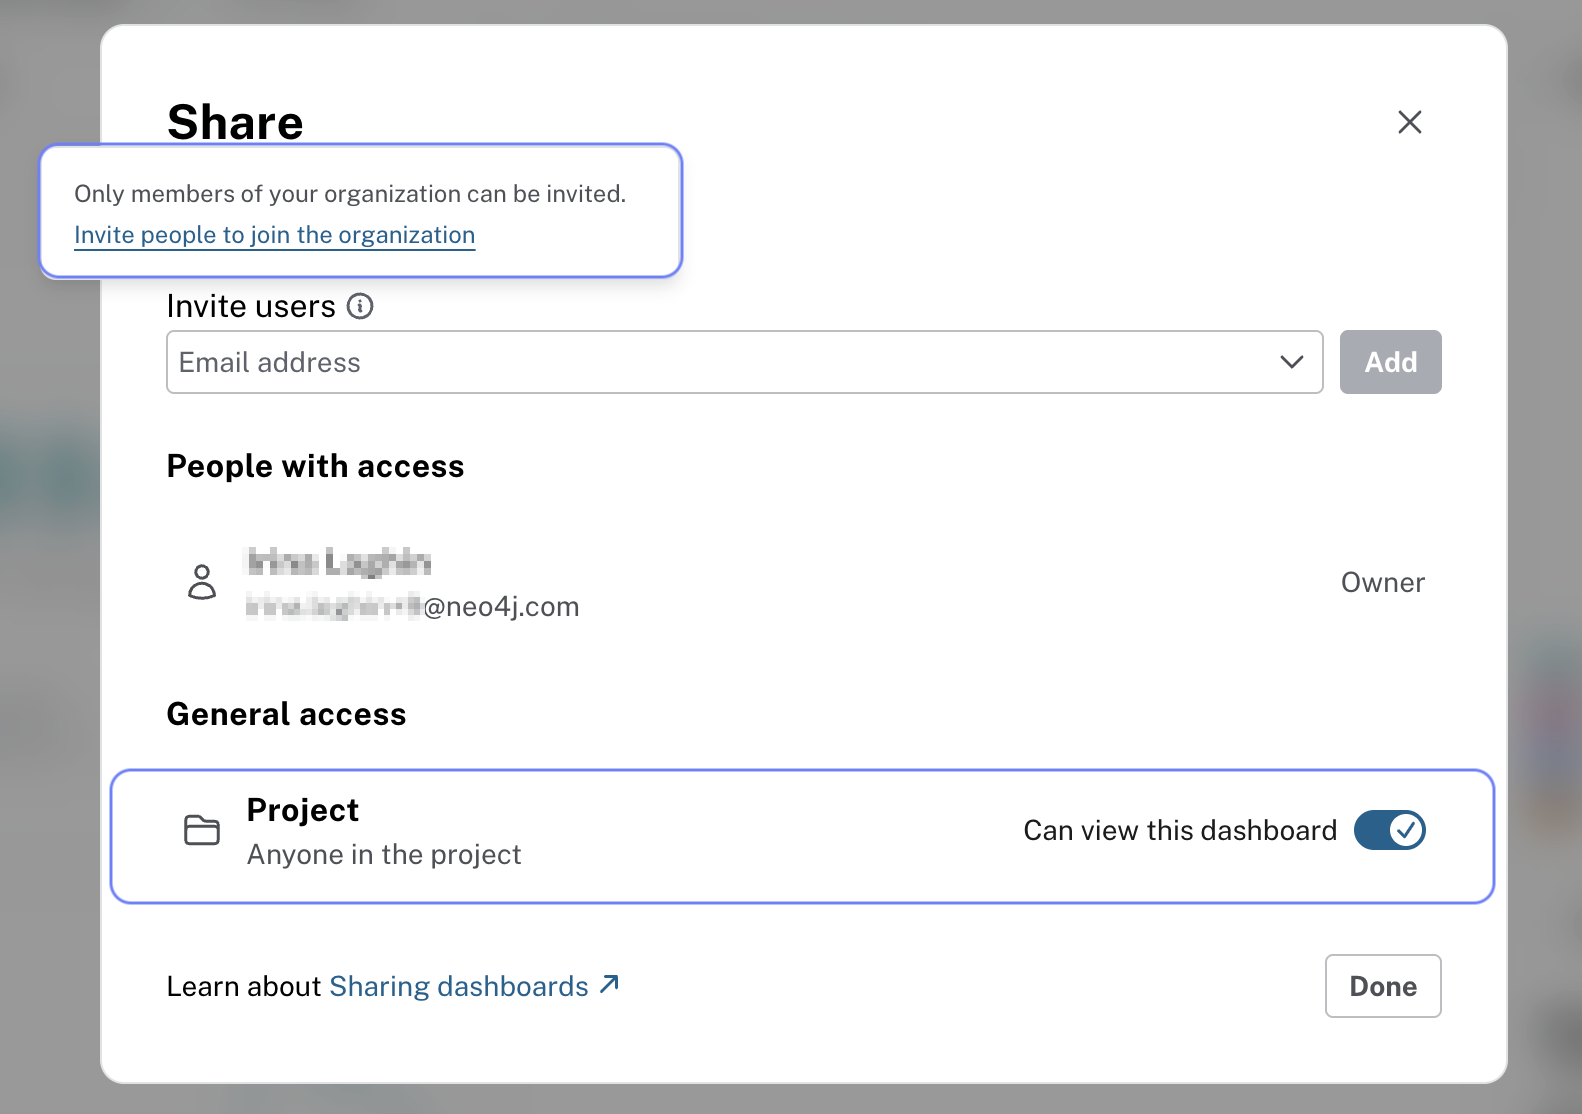
This scenario is useful when you want to share dashboards with a larger group of users without inviting them individually.
Click through sharing (no pressure to send mail)
-
Open a dashboard you actually built here.
-
Hit Share and read what the dialog offers—invite-by-email versus project-wide access. Close it if you are not inviting anyone yet.
-
Go to Project → Settings → Users and check Project role on your own row so you know where you stand before you invite others.
-
Only send a real invite if your team expects it; otherwise you have already seen the flow.
Check your understanding
Dashboard viewer role
Stakeholders need to view your dashboard to use the insights. They must not edit dashboards or access the instance directly. Which role should you assign?
-
❏ Project Admin
-
❏ Project Member
-
❏ Metrics Reader
-
✓ Project Viewer
Hint
Project Viewer is read-only: view dashboards and data, no edits and no direct instance access.
Solution
Project Viewer.
Project Viewer can view dashboards and data only. They cannot modify dashboards, change instance settings, or manage users. Use this role for stakeholders who only need to see the dashboard.
Summary
You now know how invites, project roles, and the Share dialog fit together.
Next: optional Learning Assistant prompts, then the final project and wrap-up.